In the original cottage, the kitchen was a dated kitchen complete with green vinyl floor coverings, unattractive brown tiles, timber veneer cupboard doors and a lime green laminate bench top. I like retro but there was really nothing worth salvaging in the kitchen other than the interesting 1960's (?) era kitchen island that had a quite interesting drawer / door configuration. While it wasn't big enough to use in the new kitchen we have found a place for it in the workshop until we work out what to do with it! The extensive use of asbestos behind the tiles and cupboards and wood rot in areas of the floorboards made the decision easy to move the kitchen location as it would all need to be removed anyhow.
The old kitchen therefore became the new lounge room (so we could easily access the wrap around verandah) and the new kitchen moved across the hall into the old dining room. The enclosed verandah was an obvious place to put in a pantry - particularly given that a structural beam lay above the doorway to it and it had a quite a raked roofline. While we loved the idea of a butler's pantry to help hide the mess and create lots of storage, i didn't want to end up being anti-social and hiding out in the pantry when everyone else would be socialising around the kitchen bench. The pantry also had a beautiful original sash window with lovely green and port wine glass, that was simply too nice to hide away and provided additional afternoon light to the kitchen. We therefore followed the design of the original house and kept the doorway (but moved it slightly) and replaced the purple tinted glass (purple contact stuck on glass, not even purple glass) above the door with a breezeway so it would match the other upstairs internal doors.
As our current kitchen is at the opposite end of the house to the lounge and dining room, open plan was a necessity so someone (namely me) wasn't always tucked away from all the action! The extension to the southern side of the house allowed the dining room to sit next to the kitchen and for the lounge room to be a large open space so there was no excuse for anyone for not talking to the cook! Plus I can see the telly - an obviously dangerous distraction while cooking, but I do like to watch the news at the same time...
I've always liked white kitchens. The are a timeless classic that be easily transformed by a change in handles, taps, decorative items, lights and a splash back should you want to change the look. While the current trend in kitchens seems to be quite modern and/or industrial, we opted for a more traditional look that would suit the house and hopefully not date. We used simple white panelled doors in a semi-gloss finish with a timber bench top (made with matching floorboards but a higher grade of timber). We also extended the tongue and groove boards across the back and sides of the kitchen bench so it ties back in with the walls.
Likewise, in order to link the two rooms, particularly as the pantry is visible front the kitchen and lounge room, we continued the same cabinets and benchtop from the kitchen into the pantry. We opted for open shelves in the pantry however, in order to display my extensive collection of serving and kitchenware, recipe books, glass storage jars above the bench tops that would house our mixmaster, food processor, coffee machine and toaster etc so that I didn't have to keep get them in and out when I wanted to use them! We also gained some extra height in the pantry by utilising the height created by the gable which creates a cottage style apex. Not something that is strictly a Queenslander feature as such, but we think it adds character and opens up the space by framing the window nicely. Well done to the carpenters! I love my pantry...probably more than my dressing room and ensuite and that's saying a lot!!!!
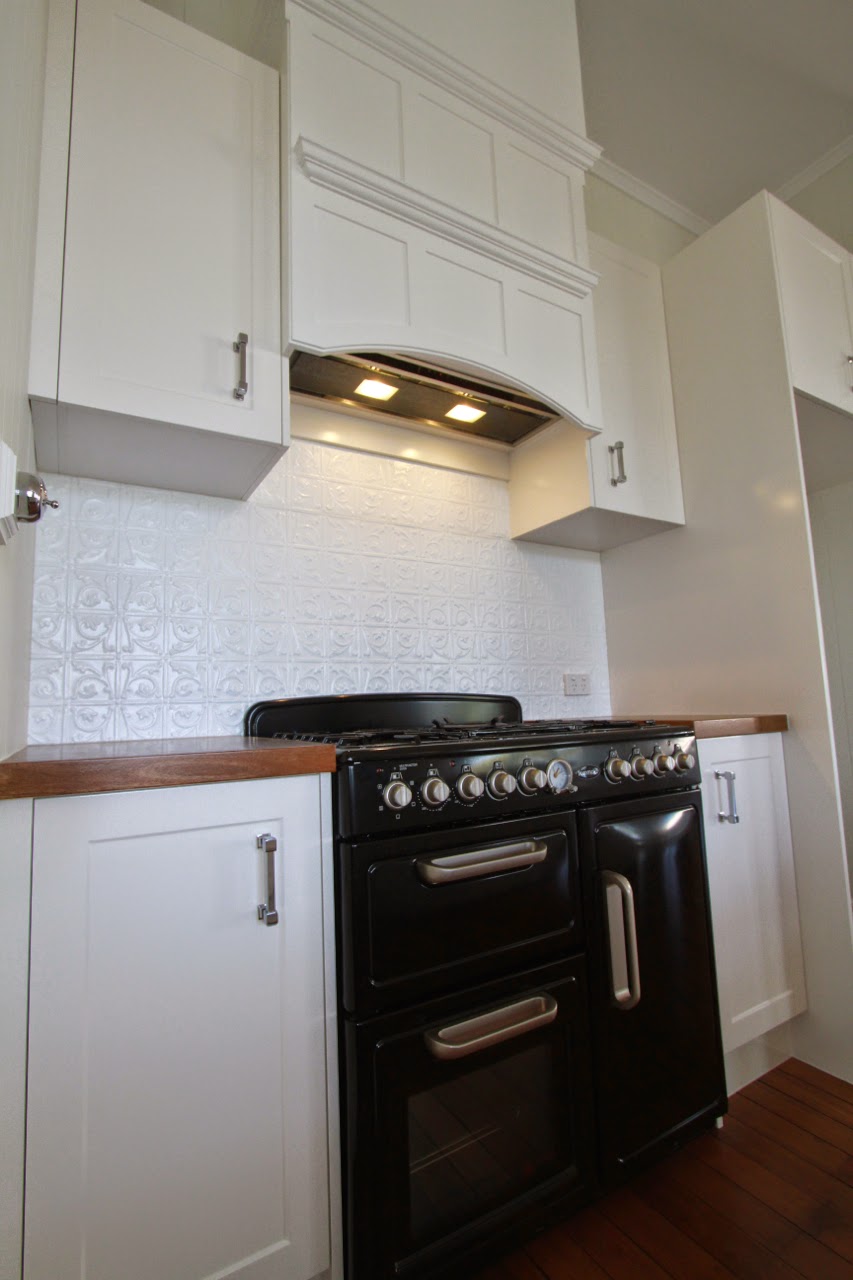
We also splurged on a custom made canopy with a built in range using simple lines to reflect the art deco influence on other finishes in the house. I think it will outlive any modern range hood and it puts the high ceilings in the kitchen with a clear focal point above the black country style oven. Given that the kitchen sits next to the dining and lounge rooms, it needed something grand to help it fit into the large open plan living area.
The appliances were relatively easy to choose as there aren't many options for integrated dishwashers (i.e. those hidden behind a door panel) and a 900mm wide freestanding oven. I've always wanted a multi compartment oven when entertaining so I'm looking forward to using it! Plus I just like looking at it. It makes me want to cook - isn't that half the battle? The same goes for the kitchen tap. Another splurge but it makes me feel all warm and fuzzy...lets face it, I love just looking at it and since it sits in the middle of the kitchen bench for all to see, I wanted it to look good!
Lastly the kitchen pendant lights were a bit of a gamble as they aren't strictly a "period" feature but we think that they still work as a vintage style that compliments the chrome kitchen cabinetry handles, light switches and other chrome detailing. Plus they look really good above a timber bench top. We like them!
The only downside to the kitchen is the overhead space above the bench cabinets next to the rangehood. I had wanted to fill them in but lost that argument to my husband who wanted to see the tongue & groove boards. We're going to need a tall ladder to get up there and clean on top of the cabinets given how high the ceilings are...I'm thinking of lining them with white contact paper so I can just rip it off and replace it instead of cleaning it. I must remember that...
More photos to come. I just couldn't wait any longer so I've put some work in progress photos in at the moment...
Details are as follows:
- Kitchen sink: Aurora ribbed double butler sink w/ basket wastes (Supplier: Vogue Spas and Bathrooms)
- Kitchen taps: Brodware Neu England Kitchen Bridge Mixer w/ country spout and white porcelain levers (Supplier: Vogue Spas and Bathrooms)
- Benchtops: Queensland Spotted Gum
- Canopy Range: Custom made by cabinet maker
- Undermount range hood: Fisher & Paykel 90cm
- Splashback: Pressed Tin 'Petra' (Supplier: Restoration Station)
- Oven: Euromaid 90cm dual fuel upright cooker
- Dishwasher: Euromaid integrated dishwasher (hidden behind white cabinet door)
- Floorboards: Original hardwood floorboards
 |
| Original kitchen - now the lounge room |
 |
| Original kitchen island |
 |
| Pantry being installed |
 |
| Pantry window. Utilising the extra height from the gable |
 |
| The kitchen bench top gets installed ready for sanding and sealing |
 |
| The cabinets fronts start getting installed and the bench gets painted |
 |
| The kitchen canopy range hood carcass gets put in place |
 |
| Pantry bench is installed ready for sealing |
 |
| Drawer fronts start getting installed. Note the transition from the old to new boards. |
Kitchen bench sealed and taps installed
Pantry benchtop installed and door / drawer fronts in place
Our lovely new kitchen taps. Yippee!
|
 |
| Kitchen range almost finished. Still being painted and waiting on the oven to be connected to the gas |
 |
| Kitchen bench finished and ready for taps |
 |
| Love the kitchen taps and sink! |
 |
| Pantry shelf supports |
 |
| Pantry hooks go up |
 |
| The pantry is complete! |
 |
| Kitchen pull out bin |
 |
| Finished at last! |